How to Draw Cool Graffiti Drawings
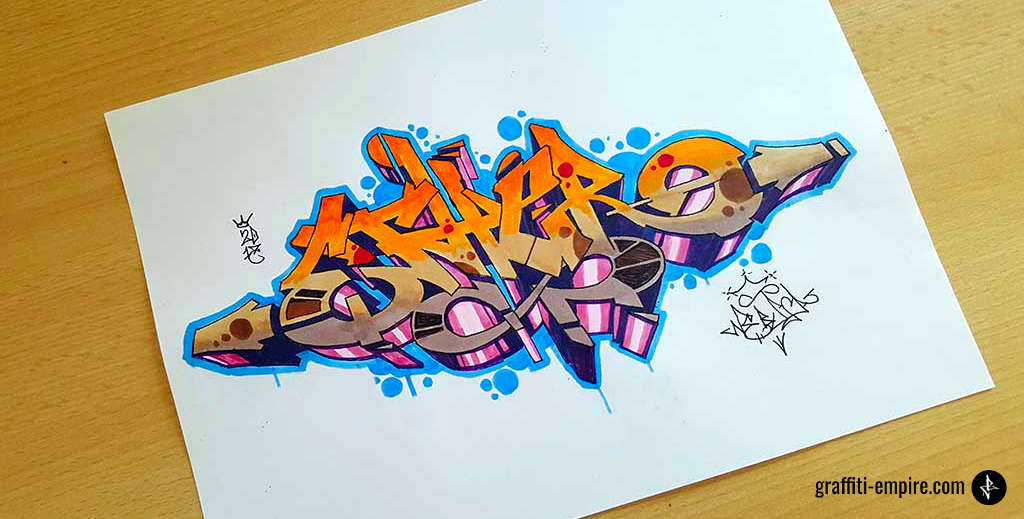
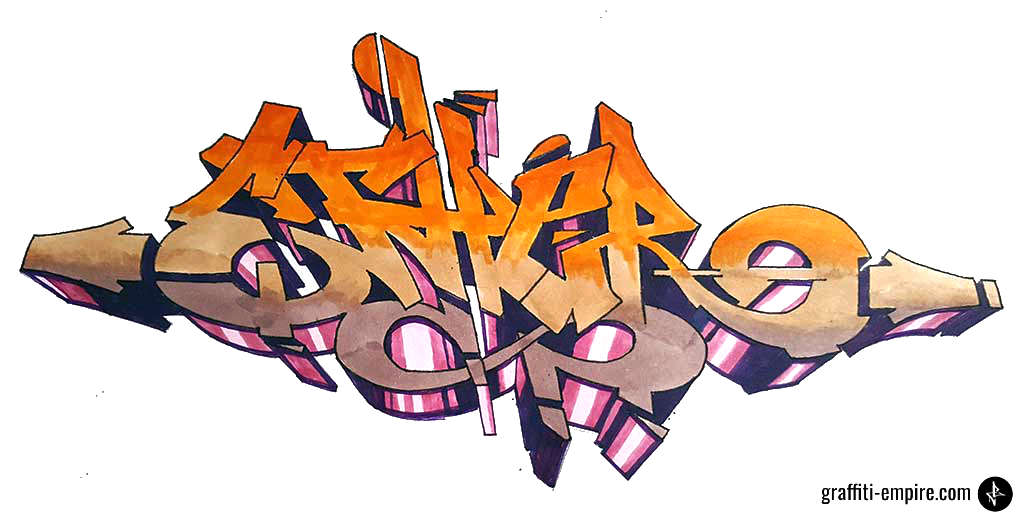
In this post, I will show you the concept of how I describe the graffiti shown in the picture below.
For a quick start for full beginners, yous can also skip to a step-by-step tutorial or our graffiti generator instead.
one. Basis: A Graffiti Tag
A graffiti tag is the footing of the pattern of a graffiti slice.
Think about a name y'all want to apply every bit a sprayer. No ideas nonetheless? Just kickoff out with your real name!
We provide several designs for each letter in our graffiti letters collection. You tin utilize it as a source of inspiration and draw your outset graffiti tag this way.
I wrote a more than in-depth article well-nigh graffiti tags and handstyles and how to construct them. You may want to check it out besides.
And so, step by pace:
- Get a marker (eastward.g. Stylefile); not a pencil; Tags look fashion ameliorate if you use the right marker – I used a Stylefile marking with tri nib tip for the graffiti tag.
- Go a piece of paper
- Become to my collection of graffiti letters or utilize my app
- Search for the letters of your name
Instance
I chose the word "Ether"
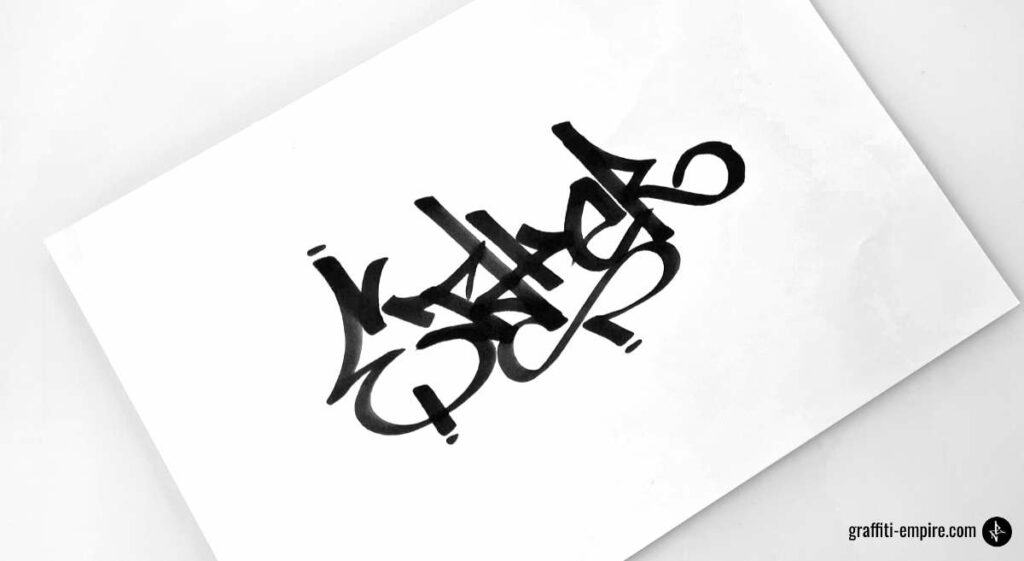
Attention: If yous utilize markers, you should probably use a cutting mat. If you just write on paper, your marker will write through the paper on your desk!
Side note: If you search for a cutting mat on Amazon, please consider reading the bad reviews. If you lot detect a review nigh bad oder coming from the mat in that location, do not buy this particular production. You cannot get rid of this aroma. I also did not pay attending to it, when I bought my first cut mat and I regretted that decision.
ii. How to Draw Graffiti: Your First Graffiti Sketch in seven Steps
Accept you redrawn your commencement graffiti? Have you created your first tag? Nice!
So, permit'south move on!
Graffiti pieces are very complex. To start out, I would recommend taking your tag and transforming it into a graffiti slice.
Every graffiti piece consists of the following parts:
- The fill-in: colored areas
- The outline: colored or black line around the fill-in
- 3D blocks
- A background
- A keyline: the line that runs around the whole piece
- The tag of the sprayer
- Optionally: highlights
- Optionally: the year of creation
I utilize the following materials:
- A standard multipurpose copy printer paper
- Staedtler Eraser
- Staedtler pencil – 2B grade
- Posca markers PC 1MR 0.7mm for highlights and outlines
- Copic Markers Multiliner 0.five for outlines
- Copic Ciao markers or Stylefile brush markers for fill-ins
And so, let'southward become started:
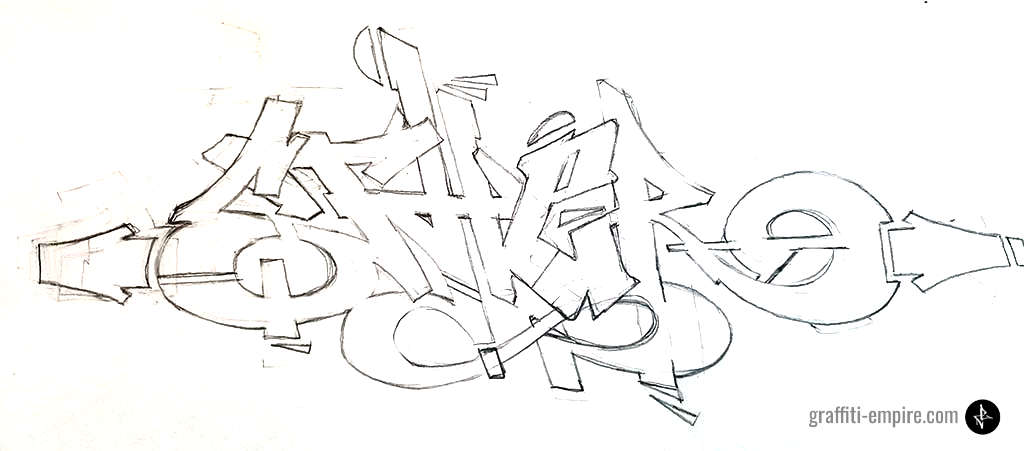
Step i: Trace Your Graffiti Tag
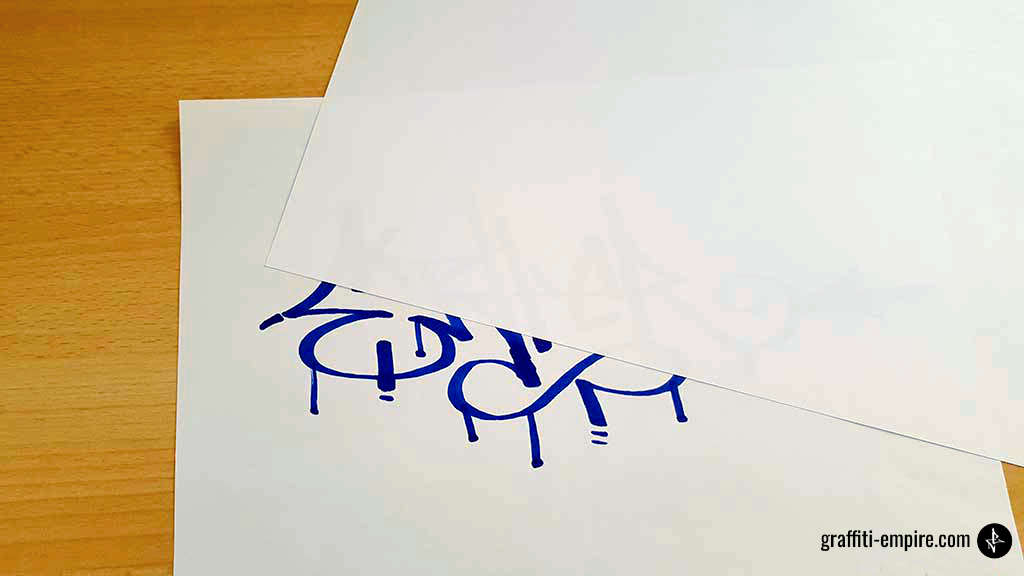
If you used a marker earlier, you will probably encounter the graffiti tag through the piece of paper to trace it. So, your first job is it to trace the edges of the lines with a pencil.
However, leave a little bit of space betwixt the edge of the mark and your new pencil line and so the letter gets bigger.
The effect should look like the image shown below. This is not that bad, merely we want to improve it.
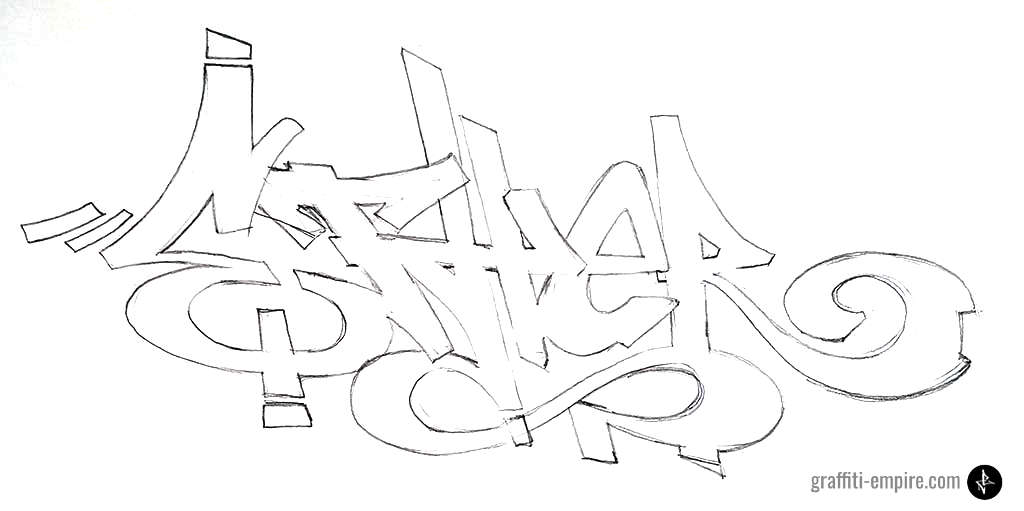
Footstep 2: Improve the Graffiti
The composition of the whole graffiti is of import as well. The "E" at the start is bigger than the "R" at the cease. So, I chose to make it smaller and add arrows on both sides to create a compact class.(red). I also added serifs and made them more complex.(blueish circles).
In typography, a serif is a modest extra stroke attached to the end of the main vertical and horizontal strokes of a letter. In graffiti, y'all often employ them to make your artwork look more than complex.
I also added forms which ameliorate the composition of the graffiti.(light-green circles)
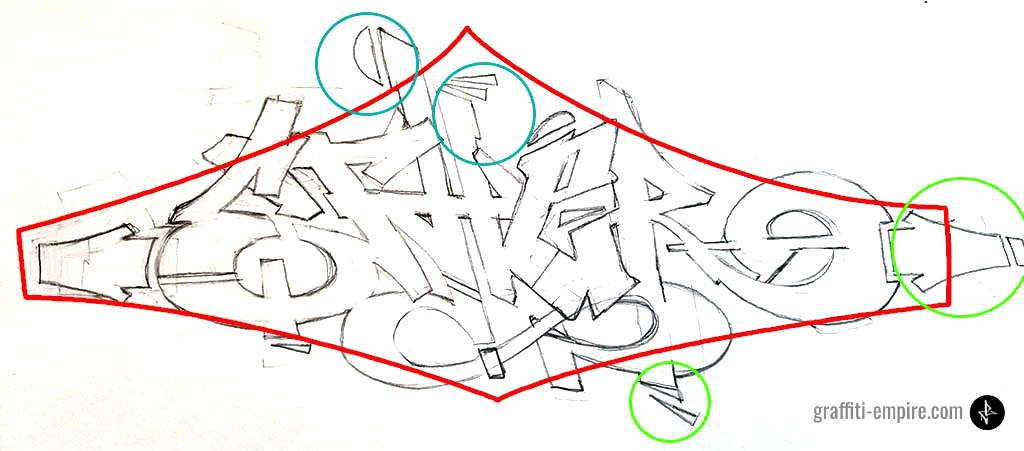
The upshot looks like the image below.
This footstep is usually fabricated past trial and error, and takes some time to chief.
And so, don't be upset if the graffiti does not look like you imagined immediately.
Even if you practice drawing graffiti a lot, this pace will take some time and y'all volition have to apply the eraser quite oft.
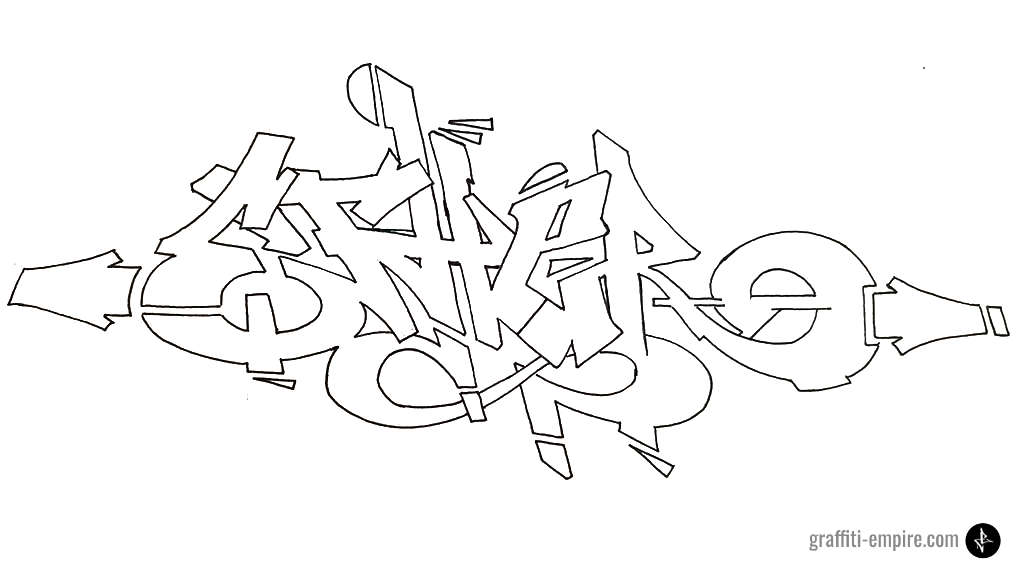
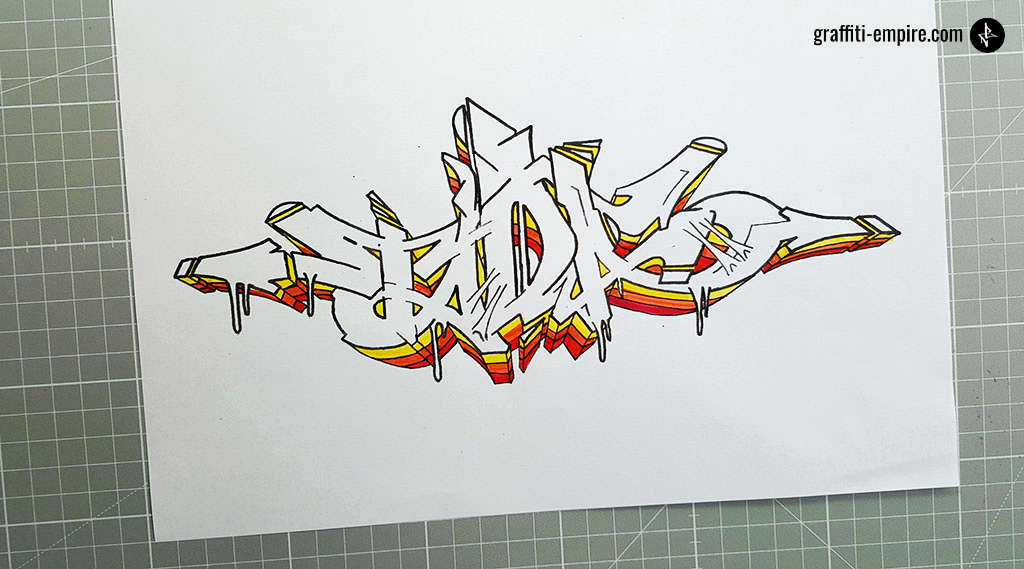
Step 3: Redraw the Lines With a Fineliner
The next stride is much easier. Have your Posca markers PC 1MR 0.7mm or Copic Markers Multiliner 0.five and redraw your pencil lines.
Wait some fourth dimension to permit the color dry. Afterward, erase all the pencil lines afterward. The outcome should look similar this.
Tip: Copy your drawing at this point. If you are not happy with the colors you lot choose afterwards, you don't accept to restart the whole process again.
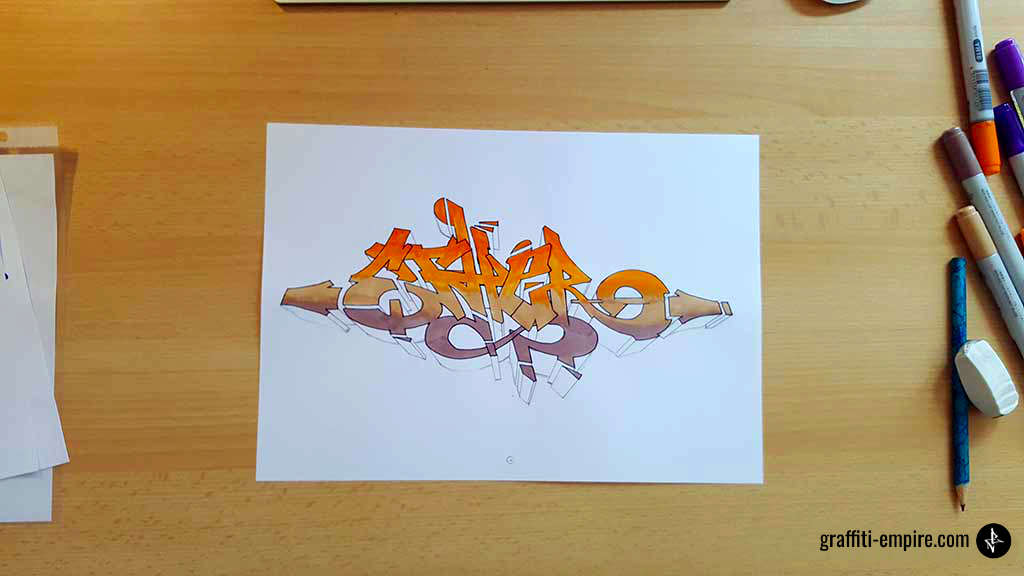
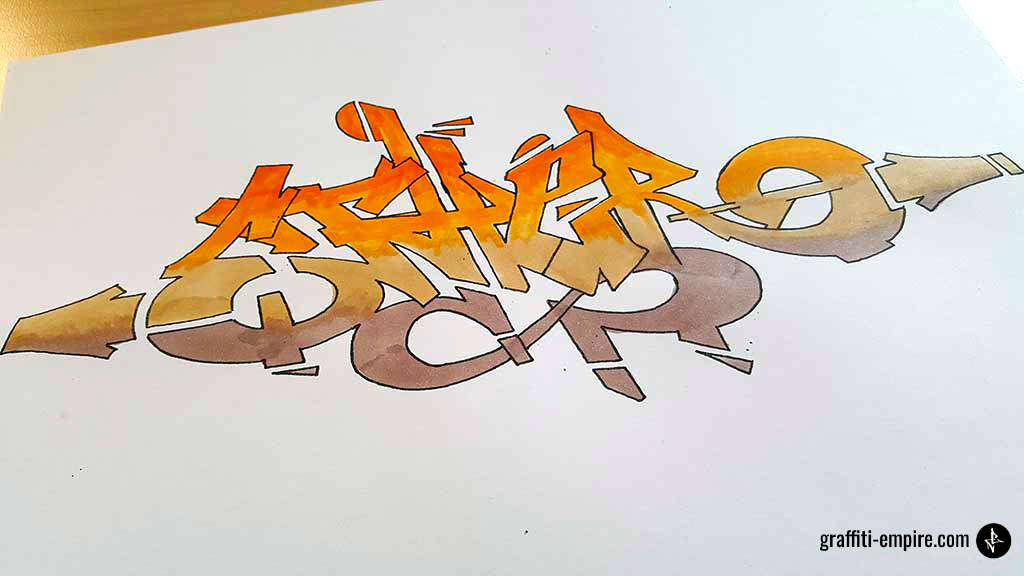
Stride four: Color Your Graffiti Sketch
To brand the coloring look more circuitous, I would always recommend to drawing gradients.
In this case, I colored the whole graffiti in one big gradient.
If you want to make your cartoon to expect even more complex, you will accept to add a unlike gradient to each alphabetic character.
Pace four.1 Which Colors Should I Use?
In general, I recommend using complementary colors for either:
- Foreground and groundwork
- Fill-ins and 3D blocks
If y'all want to use more than colors, you should use colors of the same color shade.
You tin can also simply search for a graffiti on Instagram or Pinterest and copy the colors. If yous are a beginner, this approach will probably exist the best.
Glossary
- Complementary colors: colors that are positioned opposite to each other on a color bicycle
- Adobe Colour CC is an instance of a color cycle. Colors are placed on a circle based on a colour theory. You can besides utilize the Adobe Color CC color bike as a tool to cull colors.
Stride 4.ii Color theory
Well done color combinations are the basis of good fill up-ins and coloring graffiti.
Using gradients is the secret of good coloring. Note that the gradient of the fill in is usually done past choosing 2-iv shades of one colour.
The easiest way to detect color combinations, is by going to the following website https://colour.adobe.com/
You volition find a colour wheel there. Most of the color theories are based on color wheels. They just defer a bit from each other.
The strongest colour dissimilarity is known as "complementary contrast".
So, but choose "complementary" in the dropdown bill of fare in the pinnacle left of the website and arrange the cycle to notice your preferred color combination.
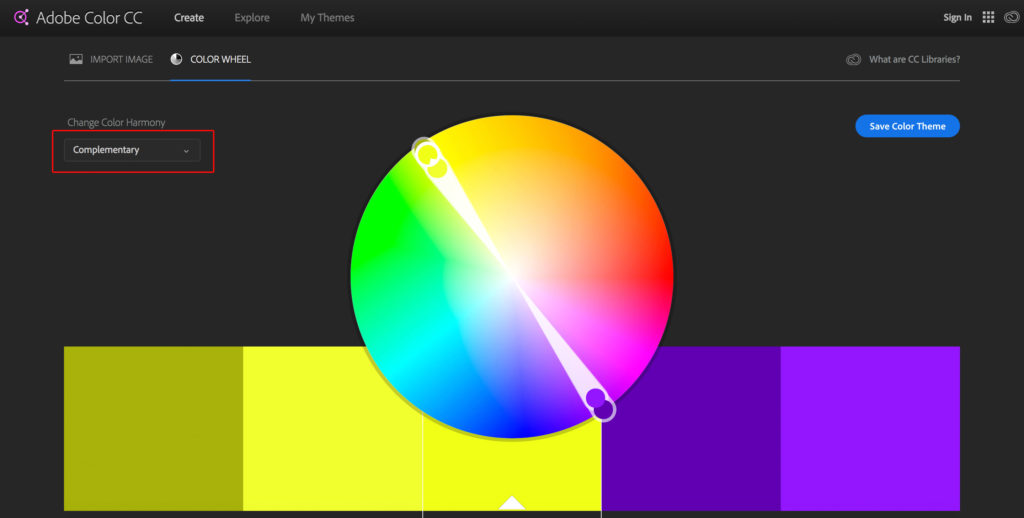
Now use shades of one color for the make full in of your graffiti and the second color for the shadows or your background/outlines.
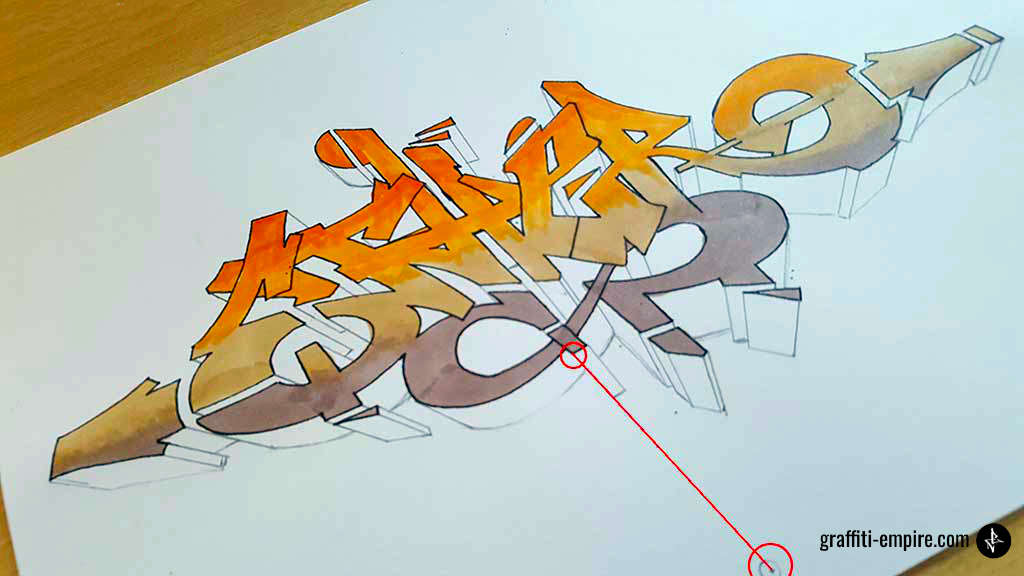
Step v: Drawing the 3D Blocks
One way of cartoon 3D graffiti blocks is choosing a vanishing point.
This means choosing a bespeak beneath the graffiti where all the 3D blocks atomic number 82 to, as is shown in the picture below.
Next, choose how big the blocks should exist. In this case, I selected ane,5cm (ane/2 inches) in length.
After, take a ruler and describe a 1.5cm (ane/2 inches) long line from every corner of the graffiti letters to the vanishing indicate. Connect the lines parallel to the graffiti outline. The results are 3D blocks.
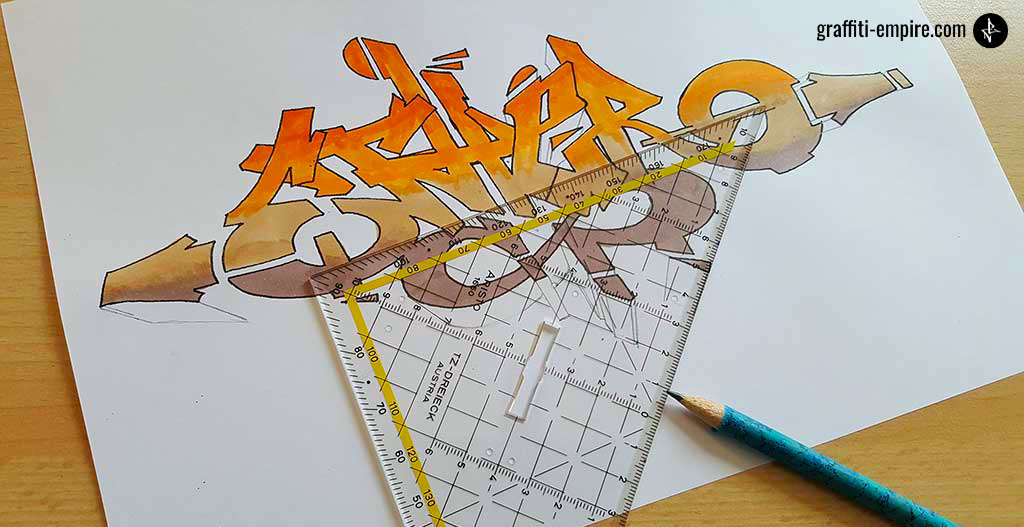
Make full the blocks with blackness colour. If you lot want to create more circuitous 3D blocks, y'all can add together light spots in the middle of the 3D cake and fade the color to dark.
Step v.1: Different Types of Coloring for 3D Blocks
If you make a gradient parallel to the outline, you will normally start from a brighter color and fade to a darker colour in the back. The image above shows a slope in blocks with boosted parallel lines to the outline.
At that place are three ways to design the parallel gradient blocks.
- Color blocks
- Color blocks with lines (like shown above)
- A fading
Another fancy design for 3D-blocks is rounded block coloring on each cake area, as is shown in the image above. Additionally, there can be a fading from brilliant in the middle to dark on the sidelines
Source: Basic ideas well-nigh 3D blocks – Reference: Graffiti School: A Student Guide and Instructor Manual – by Christoph Ganter
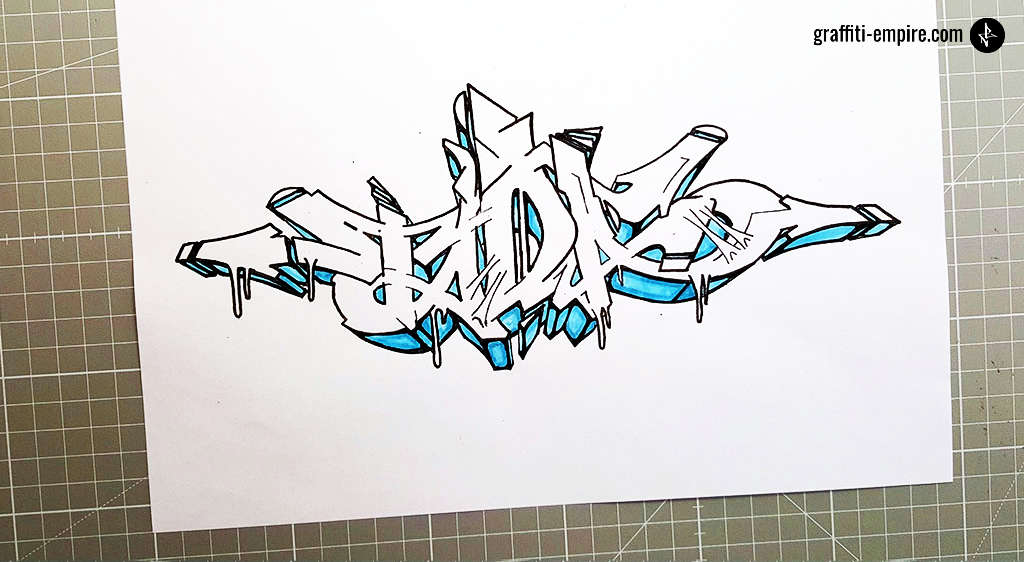
Pace 6: Keyline and Background
The line around the whole graffiti is named "keyline". In this case, I chose the complementary color to orangish: blue. I added bubbles and drips in the aforementioned color as the background.
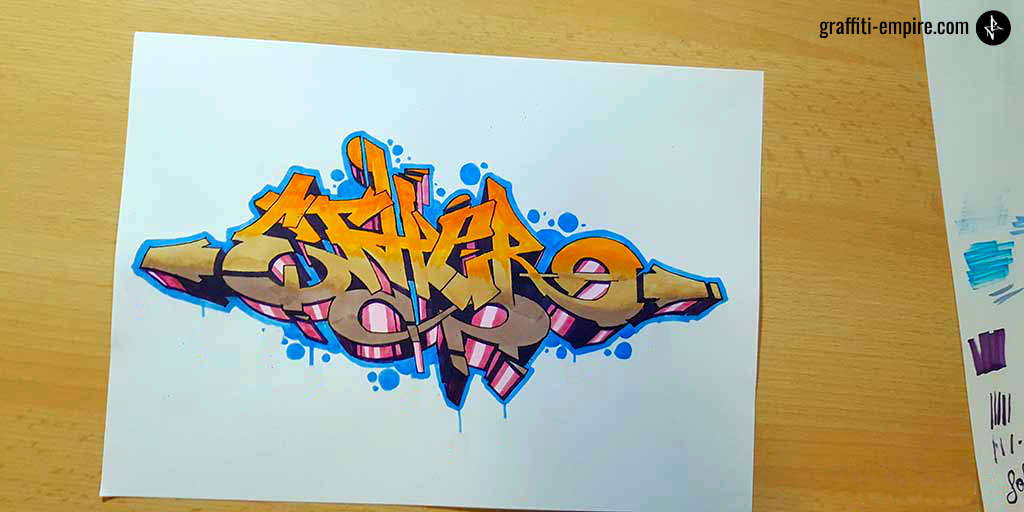
Footstep vii: Add together Highlights, Your Tag and the Yr of Creation
You can make your graffiti await more circuitous past adding shapes and lite spots above the fill-in.
Common shapes are bubbling, rectangles, arrows, reflections and outlines of shapes.
Usually, these are colored in a darker color shade of the colour used for the fill-in.
To complete your artwork, add your tag and the year of cosmos.
Congratulations! Yous finished your cartoon! 🙂
four. Wrapping information technology upwardly
I hope this tutorial helped yous in your creative journeying!
Is at that place something I forgot to mention or is in that location something yous did not quite sympathize?
Experience free to drop a comment below.
fitzgeraldfible1997.blogspot.com
Source: https://www.graffiti-empire.com/how-to-draw-graffiti-for-beginners/
0 Response to "How to Draw Cool Graffiti Drawings"
Post a Comment